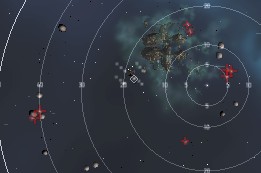
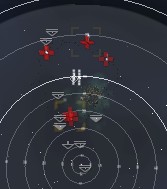
Cargo Delivery, level 4
Faction: Blood Raiders
Mission Type: Encounter
Space type: Deadspace without a gate
Damage Dealt: Em, Thermal. Kinetic missiles from the battleships.
Extras: Heavy nos by Corpus Archbishops and Corpus Harbingers
Scramblers: Elder Corpii Upholder, Elder Corpii Diviner x2
Recommended damage dealing: EM/Thermal
Recommended ship classes: Battleship, Command Ship, Battlecruiser, HAC, Recon, Faction Cruiser (Blitz: any fast & tanked destroyer, frigate or shuttle)
Video: http://www.youtube.com/watch?v=ox6bpwjboDU
Youll warp in about 40 km from a warehouse. Fly to it about 20 km out, a small spawn will appear (half a dozen frigs and cruisers). Minimal DPS, its no big deal. When you get close to the can, a much bigger spawn will appear, with about 6 battleships. The DPS isnt huge, but they use cap warfare, which can utterly screw an active tanker if youre not expecting it. If youre going to fight them, you may have to turn off reppers and/or guns to keep yourself at peak recharge. Above all, do NOT let your cap break, or youll lose for lack of repair. If you start to break, warp out, dock up, and come back fresh.
Shooting the Corpior Friar causes the respawns. Its very easy if you run away after the spawn and just snipe them all. They do no damage from 40k+.
First ambush (16km from the warehouse) (8 rats total)
2-3x Battlecruisers (Corpior Exorcists/Phantoms)2-3x HACs (Elder Corpum Dark Priests/Shadow Sages)
1-2x Elite Destroyers (Elder Corpii Friar/Herald) (warp/scramble)
1-2x Destroyers (Corpior Friar/Cleric) (trigger)

Second ambush (when shooting the trigger)
4-6x Battleships (Corpus Archbishop/Harbinger) (NOS within 25km range, 25% chance, 350 units)1x Battleship (Corpus Pope aka. Kubi Gayar)
1x Cruiser (Corpum Dark Priest/Arch sage)
2x Battlecruiser (Corpior Phantom/Exorcist)
2-3x Elite Frigs (Elder Corpii Raider/Reaver/Engraver) (web/scramble)
3 of the Archbishops/Harbingers will empty your cap in no time if they get into range.

Tip
- Mission is flagged completed after Group 1 has spawned.
- Don't forget to pickup the goods from the Warehouse.
Tip
- To do this mission non blitz and control range (ideal for sniper setups) follow these steps:
- Warp to location in a shuttle & drop a bookmark
- Approach the warehouse until the first spawn arrives, warp out dock up and swap to your combat vessel
- Warp to your bookmark at any chosen range, destroy all spawns
- Collect the goods from the warehouse, job done.
Blitz
- Method 1 (Buy From Market)
- Buy the needed goods (Quafe Ultra)
- Put the Quafe in the hanger (where the mission agent is), then accept the mission.
- Warp to mission and fly towards Warehouse until Group 1 spawns.
- Warp out and close the mission with the agent.
- Method 2 (Fast Ship)
- Warp to the mission in a shuttle or very fast (super tanked) frigate with AB (as MWD does not work). An assault frigate is ideal for this.
- Open your cargo hold and approach the warehouse at full speed.
- Be ready to open the warehouse and drag the item to your cargo hold. Quickly warp out.
- Method 3 (Stealth Ship)
- Equip a stealth Module, preferably on a small ship such as a frigate (for the speed drawback).
- Warp to the site, and when your about 25km out, turn on your Stealth.
- Turtle your way to the hanger and you'll decloak at about 3-4km from it, giving enough time to make it the rest of the way and warp out without being targeted.
CategoryLevel4
CategoryCleanup - ship lists
Nothing, including the web/scramble frigs, seems to go faster than 350m/s here, so keeping range was no problem.
I can warp in grab the Quafe and sit and tank the lot reasonably well with my Domi:
3 x 250mm II, 3 x heavy nos (I use E500s)
1 AB (hate the initial trek), 4 x Cap recharger II
1 True Sansha LAR, 2 x EM II, 2 x Therm II, 1 x Kin II, 1 x CPR II
The cap is stable when you have the nos running, so you can let the tank run while your drones do their stuff. If I could bear the wait and leave the AB off, I'd prob be using 425s or 350s to boost the damage, but there's not a huge amount of grid available.
428.78hp/s (EM: 54.19%, Expl: 0%, Kin: 0%, Therm: 45.81%)
Second spawn:
Total DPS: 2,245.25hp/s (EM: 407.54hp/s, Expl: 0hp/s, Kin: 1,500hp/s, Therm: 337.71hp/s)
Percentages: 2,245.25hp/s (EM: 18.15%, Expl: 0%, Kin: 66.81%, Therm: 15.04%)
Second spawn, alternate:
Total DPS: 3,048.75hp/s (EM: 521.50hp/s, Expl: 0hp/s, Kin: 2,100hp/s, Therm: 427.25hp/s)
Percentages: 3,048.75hp/s (EM: 17.11%, Expl: 0%, Kin: 68.88%, Therm: 14.01%)
Fit: highs: whatever fits, lows: 4 extender II, one mag amp II, lows: 5x beta shield power relays, rigs: 2x core defense purgers,d rones: hobgoblin II, garde II's
mission marked complete directly after warp in (blitz)
1x raven
1x mael
picked spot after killing 1st wave and aligned to it. then hit trigger shipped. spawned on top of raven [not my tank boat] so had to move him out as quick as possible out of nos range. manged to kill all, but had to take sb off and do manually on mael as ships got in range and i have only have average top speed of 111 [no ab etc]
as peeps have said if u keep out of range then no real problem. ships seem to have good tank as took a while to die [maybe just my skills crap]
Just did this in an Incursus.............. Didn't do anything....... Warped in right ontop of the objective, looted and warped out.. 0% damage.
Can anyone confirm that I'm not just lucky and that this mission is bugged or has a bugged variable for certain system Jump-In-Points?
But this second time now I'm 37k from the warehouse.
Pocket 1: Flew away from them in my T2 fitted Rokh. Read the guide (normal difficulty). It takes a while to bring them down with hybrids, and they hit kind a hard close up.
Destroyed all the aux power arrays beforehand, just in case. Kited directly away from the warehouse upon spawning first wave. Got swarmed, cleaned them up, pulled trigger ship - by that time I was 50km from where second ambush appeared. The BSes moved faster than me but all seemed to slow down upon getting within 26km (possibly I kited to the max). Destroyed everything without much fuss, before anything could neut or web me.
Came back in a salvage boat for Quafe and loot. Whole mission including salvage was less than an hour's work. Could have gone quicker if I hadn't been paranoid about cap&tank while fitting. Just kite away from the warehouse if you want to take everyone on.
Bounties: 6.3 million
Loot + salvage: maybe 1.5-2 million, 6 armour plates comprised most of that.
Reward: 650k inc. bonus
I had to warp out, mainly because I ignored the advice about energy neuts. After warping back in I'd let my tank (maelstrom) get to about half shields to let cap regen then turn on the shield repper til shields were nearly fixed. Since there are no spawns, my 2nd battleship (maelstrom) was able to go in and hammer on the neutralizing battleship npcs up close.
BEWARE OF THE NEUTS!
Throwing out 10 charges of cap booster 800s i only got 6 cycles of my XL shield booster, needless to say my scrammed AC-Mael died shortly afterwards.
Did it with a Maelstrom. 4x1200 and 4x1400 Artillery. Killed first group, bookmarked, killed some until my cap got low, warped out and back in at 100k, killed all NOS ships before they got close.
Loot: 0.9 M rewards, 0.3 M Modules, 5.1 M Salvage, 6.8 M Bounty = 13.1 M Isk
I didn't get the second spawn as I neared the Warehouse. I only got the first spawn. I killed all the first spawn except the Corpior Cleric. I picked up the stuff from the Warehouse and warped off to eat dinner. Came back later and killed the Corpior Cleric and got the larger second spawn. Popped all the Bs's from the warp-in beacon location before they could get close enough to NOS. Easy mission.